 (2)")
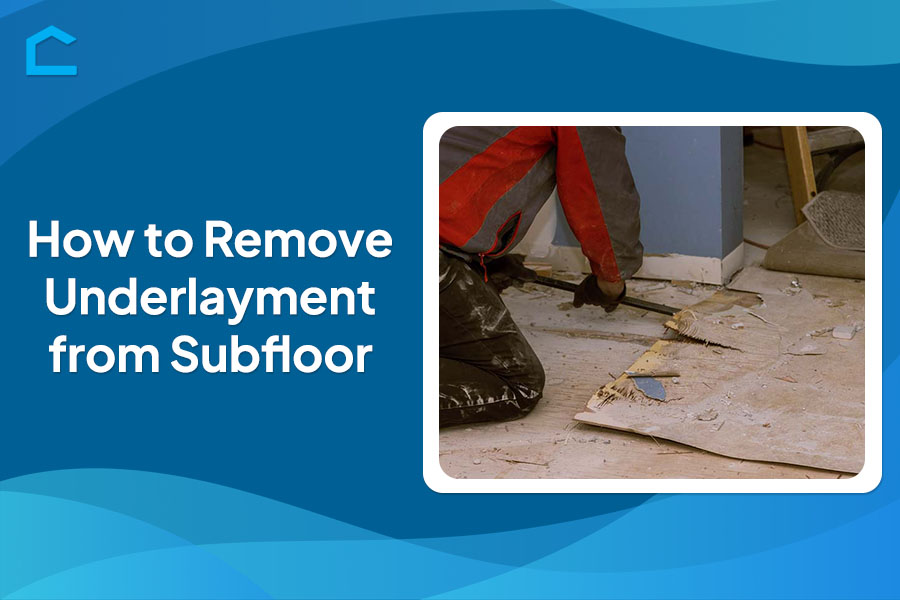
How to Remove Underlayment from Subfloor
Preparing for a new flooring installation often requires removing the existing underlayment from the subfloor. This layer, designed to provide cushioning and insulation, needs to be properly removed to ensure a smooth surface for the new flooring. But how to remove underlayment from subfloor?
This guide will walk you through the step-by-step process of removing underlayment, covering the necessary tools, safety precautions, and effective techniques.
Whether you’re a DIY enthusiast or a first-time renovator, understanding the proper methods for underlayment removal can save you time, effort, and potential damage. Follow these detailed instructions to confidently tackle this important preparatory step before installing your beautiful new floors.

Source: shutterstock.com / Photo Contributor: ungvar
How to Remove Underlayment from Subfloor?
To remove underlayment from a subfloor, start by preparing the area and assessing the underlayment’s type and condition. Begin removing it by lifting the edges with a pry bar and then carefully peeling it away, considering using a heat gun for glued sections.
Dispose of the removed material properly, and clean the subfloor thoroughly. Inspect for damage and make any necessary repairs before installing new flooring or underlayment.
Following safety guidelines and consulting professionals when uncertain is crucial for a successful removal process and subsequent renovation.
Assessing the Underlayment
Identify the type of underlayment
The first step is to identify the type of underlayment installed over the subfloor as the underlayment material affects the removal process. Common options include plywood, cement board, or foam/cork underlayments.
- Plywood underlayment – a wood-based underlayment nailed or screwed into the subfloor. It provides a smooth surface but can be challenging to remove without damaging the subfloor below.
- Cement board underlayment – a tough, moisture-resistant underlayment often used under tile floors. It is very difficult to remove intact and may require breaking it up into pieces.
- Foam/cork underlayment – thin rolled materials that can sometimes be peeled up in sections if well-adhered. They often leave a messy glue residue behind.
Underlayment condition
Assess the general condition and bonding of the underlayment to the subfloor. Older, well-adhered underlayments may require more aggressive removal techniques.
Subfloor inspection
Once the underlayment is removed, carefully inspect the condition of the exposed subfloor below. Look for any cracks, damage, moisture issues, or uneven areas that may need addressing before new flooring is installed.
The subfloor should be clean, flat, and structurally sound to provide a proper substrate.
Any repairs or relaying of subfloor sections should be done before new underlayment/flooring is put down. Thorough underlayment removal and subfloor prep are key to ensuring a smooth, long-lasting new floor installation.
Preparation for Removal
Removing underlayment from a subfloor requires proper preparation and the right tools. Gather all the necessary equipment before starting the task. This will ensure efficiency and safety during the removal process.
The necessary equipment for removing underlayment from the subfloor are:
- Pry Bar
- Hammer
- Utility Knife
- Safety Goggles
- Gloves
- Trash Bags/Containers
- Knee Pads
- Scraper
By gathering the right tools and materials beforehand, you can streamline the underlayment removal process and work more efficiently while prioritizing safety.

Source: shutterstock.com / Photo Contributor: Jasmine Sahin
How to Remove Underlayment from Subfloor
- Start at the edges
Begin the removal process by targeting the edges of the underlayment. Gently insert a pry bar or putty knife between the underlayment and the subfloor. Apply gentle leverage to lift and loosen the underlayment from the edges.
- Gradual lifting and peeling
Once an edge is loosened, start gradually lifting and peeling back the underlayment from the subfloor. Work in sections, pulling the underlayment back methodically. Avoid abrupt or forceful movements to prevent damaging the subfloor beneath.
- Remove fasteners
As you progress, keep an eye out for any fasteners or staples securing the underlayment to the subfloor. Use pliers or a staple remover to carefully remove these fasteners. This will prevent them from catching and tearing the underlayment during the removal process.
- Systematic approach
Adopt a systematic approach, working in manageable sections across the room. Avoid removing large areas of underlayment at once, as this can increase the risk of damage or injury.
- Patience and caution
Removing underlayment can be a laborious task, requiring patience and caution. Take breaks as needed to prevent fatigue, which can lead to careless mistakes or injuries.
- Assess for adhesive residue
After removing the underlayment, inspect the subfloor for any remaining adhesive residue. Scrape off any stubborn adhesive using a putty knife or floor scraper, ensuring a clean surface for the new flooring installation.
Cleaning and Repairing the Subfloor
Removing adhesive residue
After the underlayment has been removed, it’s likely that some adhesive residue will remain on the subfloor surface. This residue should be scraped or sanded away to ensure a smooth and clean surface for the new flooring installation. A putty knife, floor scraper, or orbital sander can be effective tools for this task.
Inspecting for damage
With the subfloor now exposed, it’s crucial to conduct a thorough inspection for any signs of damage. Look for cracks, soft or spongy spots, water stains, or any other irregularities that could compromise the integrity of the new flooring installation.
Repairing the subfloor
If any damage is detected, it’s essential to address it before proceeding with the new flooring installation. Depending on the extent of the damage, repairs may involve patching cracks or holes with a suitable floor patching compound, replacing sections of the subfloor entirely, or even addressing issues with the joists or supporting structures beneath.
A stable and level subfloor is crucial for the longevity and performance of any new flooring material. Neglecting to repair subfloor damage can lead to issues such as uneven floors, squeaky boards, or premature wear and tear on the new flooring.
For extensive subfloor repairs or if you’re unsure about the scope of the work required, it’s advisable to seek professional assistance. A qualified contractor or flooring specialist can assess the situation and provide guidance on the best course of action to ensure a solid foundation for your new flooring installation.

Source: shutterstock.com / Photo Contributor: Nils Petersen
Conclusion
Removing underlayment from a subfloor is an essential step in preparing for a new flooring installation. By following the proper techniques outlined in this guide, you can ensure a smooth and successful removal process.
With this knowledge on how to remove underlayment from subfloor you can take on the home improvement project with greater confidence and clarity. Remember to take the necessary safety precautions, gather the right tools and materials, and work methodically to avoid damaging the subfloor.
Thorough preparation and attention to detail during the underlayment removal and subfloor repair stages can save you time, money, and potential headaches down the line.