How to Replace Window Sill

Don’t let a damaged or outdated sill dampen your home’s charm and functionality. Replacing a window sill might sound challenging, but with some know-how to replace window sill, you can breathe new life into your windows and enhance your home’s overall appeal. Visualize transforming your space with a fresh, sturdy sill that looks great and protects against drafts and leaks.
In this guide, we’ll walk you through the process of replacing a window sill, from assessing the damage to selecting the appropriate materials and executing the replacement. So, roll up your sleeves and get ready to tackle this home improvement project with confidence!

How to Replace Window Sill
Replacing a window sill is a home improvement project that can enhance both the appearance and functionality of your windows. This task requires careful planning, precise measurements, and attention to detail. Here’s our comprehensive guide to help you through the process:
Planning and preparation
Start by evaluating the current condition of your window sill. Decide whether a full replacement is necessary or if repairs will suffice.
Also, take into account the style of your home and the local climate when selecting materials. Establish a realistic budget covering the cost of materials, tools, and any unforeseen issues.
Next, create a detailed list of the necessary tools and materials. Commonly required items include a pry bar, saw, level, caulk gun, measuring tape, new sill material, construction adhesive, nails or screws, caulk, and appropriate finishing materials.
Having all the necessary items before you begin will help avoid delays and frustration. Set aside ample time for the replacement process, as rushing can lead to mistakes and an unsatisfactory result. If you’re new to DIY projects, allow extra time to work carefully and methodically.
Choosing the right materials
Window sills are commonly made from wood, PVC, or composite materials, offering distinct advantages. When choosing the right materials, it’s also helpful to know the best materials for window frames for long-lasting performance.
Wood delivers a classic look and can be customized with paint or stain to suit your decor. However, it demands regular maintenance and is vulnerable to moisture damage.
On the other hand, PVC is virtually maintenance-free and resistant to moisture, making it an excellent choice for humid environments or areas with high water exposure. Composite materials strike a balance, combining wood’s aesthetic appeal with synthetic materials’ durability.
When selecting a window sill material, evaluate factors such as durability, maintenance needs, cost, and visual appeal. Consider how well the material will withstand your local climate and the level of upkeep you are willing to commit to.
Measuring the existing window sill
Accurate measurements are essential for ensuring your new sill fits perfectly. Begin by clearing any obstructions around the window, then use a tape measure to measure the length, width, and depth of the existing sill. Be sure to take multiple measurements along each dimension to account for variations.
Also, check if the existing sill has a slope, which helps with water drainage. If it does, note the angle to replicate it in the new sill. Record all measurements clearly, and consider creating a simple sketch with labeled dimensions for easy reference.

Removing the old window sill
Protect the surrounding area with drop cloths or plastic sheeting. Use a utility knife to score along the edges of the sill where it meets the window frame and wall, cutting through any paint or caulk. This will help prevent damage to surrounding surfaces, such as the window glass or frame, during removal.
Next, carefully pry up the old sill using a pry bar, working slowly to avoid damaging the window frame or wall. Remove any nails or screws holding the sill in place. But be mindful of any hidden wires or insulation beneath the sill.
After removal, inspect the exposed area for signs of water damage, rot, or insect infestation. Address these issues before proceeding with the new installation.
Preparing the window frame
Begin by thoroughly cleaning the area to remove any dirt, debris, or old adhesive. After cleaning, inspect the frame for any damage.
If you find minor cracks or holes, fill them with wood filler or epoxy. For more significant damage, consider replacing the affected sections of the frame.
Once repairs are complete, sand the area to create a smooth, even surface for the new sill. Use a spirit level to ensure the frame is properly leveled, adding shims if necessary. If the frame is wooden, apply a coat of primer or sealer to protect it from moisture.
Cutting the new window sill
Mark your measurements clearly on the new material and double-check them against your original measurements before cutting. Use the appropriate tools: a circular or table saw for straight cuts, and a miter saw for any angled cuts required for drainage.
We advise you to always wear safety glasses and follow proper safety procedures. Make cuts slowly and steadily to achieve clean, straight edges. After cutting, dry-fit the sill to ensure a proper fit and make necessary adjustments.
Installing the new window sill
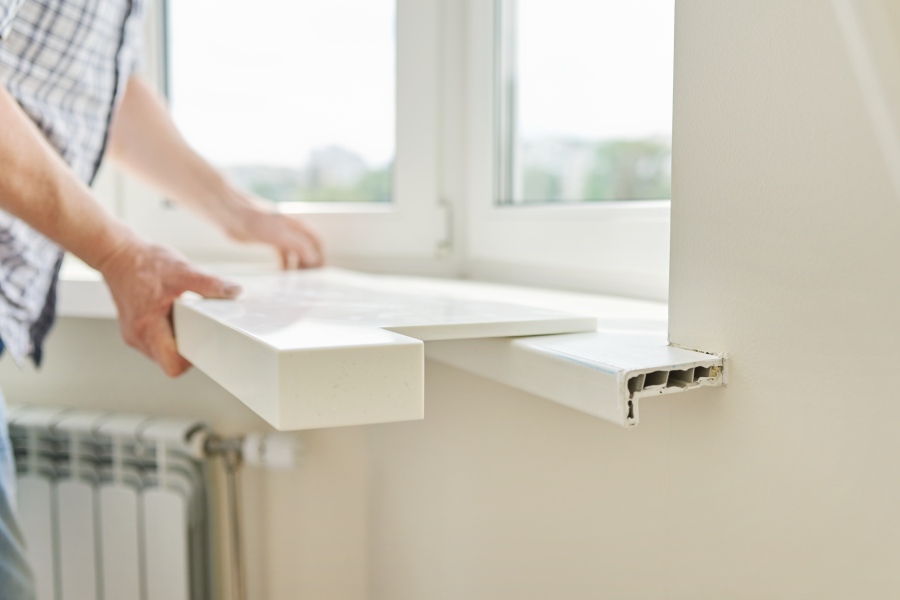
Apply a bead of construction adhesive in a zigzag pattern along the window frame. Carefully set the new sill onto the frame, pressing it firmly into the adhesive. Also, use a level to make sure the sill is perfectly horizontal, adjusting as necessary before the adhesive sets.
Then, secure the sill further by driving finishing nails or screws every few inches along its length. To avoid splitting the wood, countersink the nails or pre-drill the screw holes.
If the sill extends beyond the window frame, add support blocks underneath for extra stability. Fill any nail holes or screw heads with wood filler or caulk. And allow the adhesive and filler to dry completely before proceeding.
Sealing and finishing
Once the adhesive has cured, apply a bead of high-quality exterior caulk around the edges where the sill meets the window frame and wall. To ensure an even application, use a caulk gun, then smooth the caulk with a wet finger or a caulking tool. Pay special attention to the outer edges and joints, thoroughly covering all areas.
After applying the caulk, let it dry according to the manufacturer’s instructions. If you have a wood sill, smooth the surface before applying primer, followed by paint or stain.
We recommend opting for a finish that matches your home’s interior and provides good protection against moisture and UV rays. Apply thin, even coats of paint or stain, allowing each coat to dry completely before applying the next. For PVC or composite sills, refer to the manufacturer’s guidelines for finishing, as some materials may not require additional treatment.
Cleaning and final inspection
Start by cleaning the new sill and the surrounding areas, removing all debris and disposing of it properly. After cleaning, inspect your work thoroughly to ensure the sill is level and securely installed. Verify that caulk and sealants are fully dried and address gaps or imperfections.
Next, test the window to ensure it opens and closes smoothly without interference from the sill. Look for any uneven areas or potential water pooling, and address these issues promptly while the materials are still adjustable. This final inspection is crucial for ensuring the sill’s longevity and functionality.

How to Replace Window Sill Inside
Replacing an interior window sill can significantly enhance your room’s appearance while addressing damage from moisture or wear. Begin by evaluating the condition of the existing sill and selecting a suitable replacement material such as wood, MDF, or PVC. Once you have gathered the necessary tools and materials, accurately measure and cut the new sill.
Carefully remove the old sill and clean the area to prepare for the new installation. Address any damage to the window frame and ensure it is level before proceeding. Next, install the new sill using construction adhesive, then secure it with nails or screws.
To finish, fill gaps or holes, apply caulk for a smooth, seamless finish, and paint or stain the sill as desired. Lastly, inspect the installation to ensure it is properly aligned and functioning.
How to Replace Window Sill Outside
Preparation and removal
Replacing an exterior window sill is essential for protecting your home from water damage and enhancing its appearance. Start by assessing the condition of the current sill and selecting durable, weather-resistant materials like pressure-treated wood, PVC, or composites.
Once you’ve chosen your materials, gather the necessary tools and exterior-grade adhesives and sealants. This ensures a smooth process similar to replacing window seals to keep your windows airtight and functional.
Carefully remove the old sill, inspect the underlying structure for damage, and make any necessary repairs. Ultimately, install proper flashing to ensure effective water protection.
Installation and finishing
Begin by cutting and fitting the new sill, ensuring it has the proper slope for effective drainage. Secure the sill using exterior-grade adhesive and corrosion-resistant fasteners, and seal all edges with caulk. Complete the process by painting or sealing the sill to provide added protection.
After installation, conduct a thorough inspection, including a water test, to verify everything functions correctly. To extend the life of your new exterior window sill, perform regular maintenance such as cleaning and resealing.
Conclusion
Replacing a window sill, whether inside or outside, can greatly enhance your home’s appearance and functionality. While it might seem challenging, you can tackle this DIY project efficiently with the right tools and knowledge.
As mentioned, start by assessing the current condition of your sill, choosing the appropriate materials, and carefully measuring and cutting the new sill. Follow precise installation steps, including applying adhesive, securing the sill, and sealing edges. Ultimately, conduct thorough inspections and regular maintenance to ensure long-lasting results.
Gather your tools, follow the steps outlined on how to replace window sill, and give your windows the upgrade they deserve!
