How to Prepare for Painting Walls

Preparing your walls for painting is the key to achieving a flawless and long-lasting finish. You risk dealing with imperfections like streaks, bubbles, or peeling paint without proper preparation. Whether updating a room with a fresh coat or changing the color, learning how to prepare for painting walls is essential for a professional-looking result.
In this guide, we’ll walk you through each step, from cleaning off dust and dirt to filling in holes and cracks. We’ll also cover how to properly sand and prime your walls for the best adhesion and smooth finish. With these tips, you’ll set the stage for a beautiful paint job that lasts, making the entire process easier and more enjoyable.
Let’s dive into the essentials of how to prepare for painting a room!
Source: shutterstock.com/ Photo Contributor: Prostock-studio
How to Prepare for Painting Walls
Proper wall preparation is crucial before painting. The process involves several key steps: cleaning, repairing, sanding, and protecting surrounding areas. By taking the time to prepare thoroughly, you’ll ensure better paint adhesion, a smoother application, and a more durable finish that will last for years.
How to clean dirty walls before painting
Start by removing dust and cobwebs from the walls using a soft-bristled broom or a vacuum cleaner with a brush attachment. Next, wash the walls with a mixture of warm water and mild detergent, applying it with a sponge or soft cloth. For any stubborn stains or greasy spots, use a degreaser or a trisodium phosphate (TSP) solution.
Once the walls are clean, rinse them thoroughly with clean water and allow them to dry completely before proceeding with repairs. Carefully inspect the surface for holes, cracks, or imperfections. For small holes, use a spackling compound, while larger areas can be treated with drywall joint compound.
Apply the filler with a putty knife, let it dry, and then sand it smooth. For deeper cracks, reinforce the repair with mesh tape before applying the joint compound. After all repairs are complete and dry, sand the patched areas to ensure they blend seamlessly with the surrounding wall.
Sanding
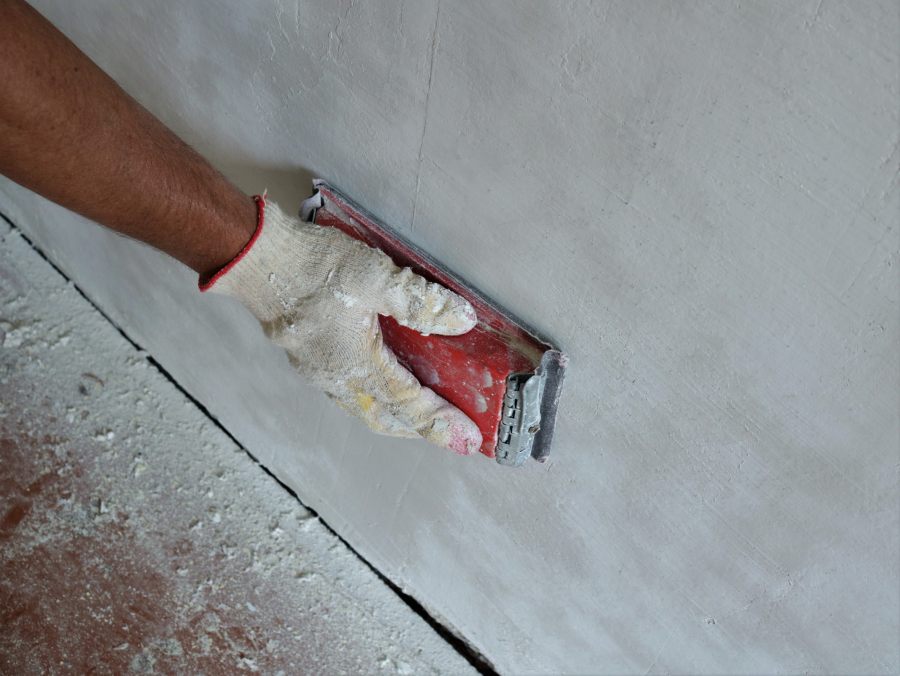
Lightly sand the entire wall surface with fine-grit sandpaper (120-150 grit) attached to a sanding block or pole sander. This step helps smooth out any remaining imperfections while creating a slightly rough texture that enhances paint adhesion.
Be sure to focus on areas around repairs, as well as any glossy or previously painted surfaces. After sanding, wipe down the walls with a tack cloth to remove any dust particles, ensuring a clean, dust-free surface for painting.

Taping and protecting
To ensure a clean painting job, start by applying painter’s tape along the edges of the trim, baseboards, window frames, and where the walls meet the ceiling. Press down firmly on the edges of the tape to prevent paint from seeping underneath.
Next, cover the floors with drop cloths or plastic sheeting, securing them with painter’s tape. You should remove or cover any furniture and use plastic sheeting to protect items that cannot be moved from the room. This preparation will help create a tidy workspace and protect your area from unwanted paint splatters.
Gathering tools and materials
Before embarking on your painting project, it’s essential to assemble all necessary tools and materials. This preparation saves time and prevents interruptions once you begin painting.
Key items to gather include suitable brushes for walls, paint, primer, wall paint rollers, paint trays, drop cloths, painter’s tape, sandpaper, and a ladder or step stool. Additionally, ensure you have safety equipment, such as gloves, eye protection, and a dust mask for sanding. By taking these steps, you set yourself up for a smoother and more efficient painting experience.
Do You Need to Prime a Wall Before Painting?
Priming walls before painting is often essential, especially for new drywall, repaired surfaces, or when making significant color changes. Selecting the right primer for your project is key; whether it’s a stain-blocking or high-adhesion variety, choose one tailored to your needs.
To apply, use a roller for large areas and a brush for edges, working from top to bottom for an even coat. Allow the primer to dry completely, and for heavily stained surfaces, consider applying a second coat. Priming creates a smooth, uniform base, which improves paint adhesion and ensures a more professional finish.
In addition, it seals porous surfaces, prevents stain bleed-through, and may even reduce the number of paint coats required. Priming can also help hide imperfections and boost the durability of your paint job. While previously painted walls in good condition might not always need priming, it’s generally a good idea to prime when in doubt.
How to Prepare Painted Walls for Repainting
Preparing painted walls for repainting is quite different from tackling bare walls. For painted surfaces, begin by thoroughly cleaning with a mild detergent, and then inspect for any peeling paint or damage. Sand any glossy areas and repair imperfections. If the existing paint is in good condition, you may be able to skip priming.
Painted walls generally need less preparation since they’re already sealed, which might result in needing fewer coats of paint. On the other hand, bare walls require more extensive prep. Unpainted drywall is porous and must be primed to create a uniform base for the paint.
Moreover, new walls often have more imperfections, such as nail pops or visible seams, that must be filled with joint compound, sanded, and primed before painting. Overall, while painted walls typically require minimal work, bare walls demand significantly more time and effort to achieve a smooth, professional finish.

Conclusion
Learning how to prepare for painting walls is necessary for achieving a professional, long-lasting finish. Each step, from cleaning and repairing to sanding and priming, ensures proper paint adhesion and a smooth result.
Skipping these tasks can lead to imperfections or premature wear. Investing time in proper preparation sets the foundation for a flawless paint job that enhances your space and stands the test of time.
With experts like Services Curated, finding reliable professionals to help with this process becomes easier. Our thorough verification ensures you work with trusted contractors, helping you achieve a professional finish!
