How to Prepare for New Flooring Installation

Installing new flooring can transform the look and feel of a room, but proper preparation is key to ensuring a successful and long-lasting result. Whether you’re tackling a DIY project or hiring professionals, taking the time to get ready for new floors is an essential step that shouldn’t be overlooked.
From removing existing flooring to ensuring a level subfloor, the right preparatory work lays the foundation for beautiful and durable new floors.
In this comprehensive guide, we’ll walk you through the crucial steps in learning how to prepare for new flooring installation. We’ll cover everything from selecting the appropriate underlayment and moisture barriers to moving furniture and clearing the work area. Get ready to roll up your sleeves and dive into the essential prep work that will set the stage for your dream floors.

How to Prepare for New Flooring Installation
Preparing for a new flooring installation involves several key steps. First, you need to select the right type of flooring for your space and measure the area accurately.
Once chosen, clear the installation space of furniture and other obstacles and ensure the subfloor is clean and level. Repair any damage to the subfloor and allow the new flooring material to acclimate to the environment if necessary. Then, coordinate with installation professionals to schedule the installation at a convenient time.
Taking these steps ensures a smooth and successful flooring installation process, leaving your space refreshed and upgraded.
Clearing out the space
Before beginning your new flooring installation, it’s important to completely clear out the room. Start by removing all furniture and disassembling larger pieces if necessary for easy transportation. Then, remove any remaining items like area rugs, decor, and electronics, enlisting help for heavier objects.
Cover upholstered furniture with breathable sheets and use bubble wrap or sturdy boxes for delicate items. Choose a secure, climate-controlled area for on-site storage, or opt for a reputable off-site facility with security measures.
Take precautions to prevent dust, debris, moisture damage, or mold growth during the temporary storage. By properly clearing out and protecting your belongings, you’ll be well-prepared for the next phase of your flooring project.
Addressing the existing flooring
- Assessment – Before laying down new flooring, thoroughly assess the existing surface. Determine if any materials need removal, repair, or cleaning.
- Removal – If there are outdated or damaged materials present, carefully remove them. For hardwood, laminate, or vinyl planks, use a gentle prying technique to avoid damaging the subfloor.
- Caution with glued-down floors – Exercise caution when dealing with glued-down floors to prevent subfloor damage.
- Subfloor inspection – Inspect the subfloor for any issues such as squeaks, loose boards, cracks, or divots. Address these problems using appropriate methods such as screws, adhesive, or patching compounds.
- Recycling or disposal – Consider recycling old flooring materials if feasible. Otherwise, dispose of them properly in accordance with local regulations.
- Smooth foundation – By following these steps, you’ll ensure a smooth and even foundation, essential for a flawless new flooring installation.
Preparing the subfloor
Properly preparing the subfloor is crucial for a successful new flooring installation. Start by thoroughly cleaning the subfloor, removing any dirt, debris, or adhesive residue, and allowing it to dry completely.
Next, inspect for any significant unevenness. Use a self-leveling compound or floor patch to level minor irregularities. Larger dips may require underlayment panels or self-leveling concrete.
Carefully examine for signs of damage like cracks, holes, or rot.
Repair as needed using patching compounds, epoxy fillers, or replacing affected sections. Ensure all repairs are flush with the surrounding surface. A clean, dry, and level subfloor will create a solid foundation to support your new flooring for years to come.

Acclimating new flooring materials
Acclimating new flooring materials is a crucial step before installation to prevent future issues like buckling, warping, or gaps. The process involves conditioning the materials to the temperature and humidity levels of the room where they will be installed, allowing them to adjust and stabilize.
Hardwood and laminate
- Leave boxes unopened.
- Distribute boxes throughout the room.
- Acclimate for 48-72 hours.
Vinyl and tile
- Remove from packaging.
- Spread out in the installation area.
- Acclimate for 24-48 hours.
Follow manufacturer guidelines for acclimation time and monitor temperature/humidity levels. Neglecting proper acclimation can lead to costly problems, so taking this step ensures your new flooring expands or contracts as needed before installation for long-lasting performance.
Planning for doors and trim
Planning for doors and trim during a home renovation or flooring installation is critical. Assess door clearances by measuring the existing gap. Account for the new flooring thickness. Determine if trimming or removal is necessary. Carefully remove doors and store them safely during the project, reinstalling them once complete.
For baseboards and trim, use a pry bar to remove them gently. Label and store the pieces. Adjust lengths as needed for the new flooring height. Then, reinstall using a nail gun or finish nails. Caulk and paint or stain for a seamless finish.
Proper preparation and handling of doors, baseboards, and trim can ensure a successful renovation outcome.
Considering moisture barriers and underlayment
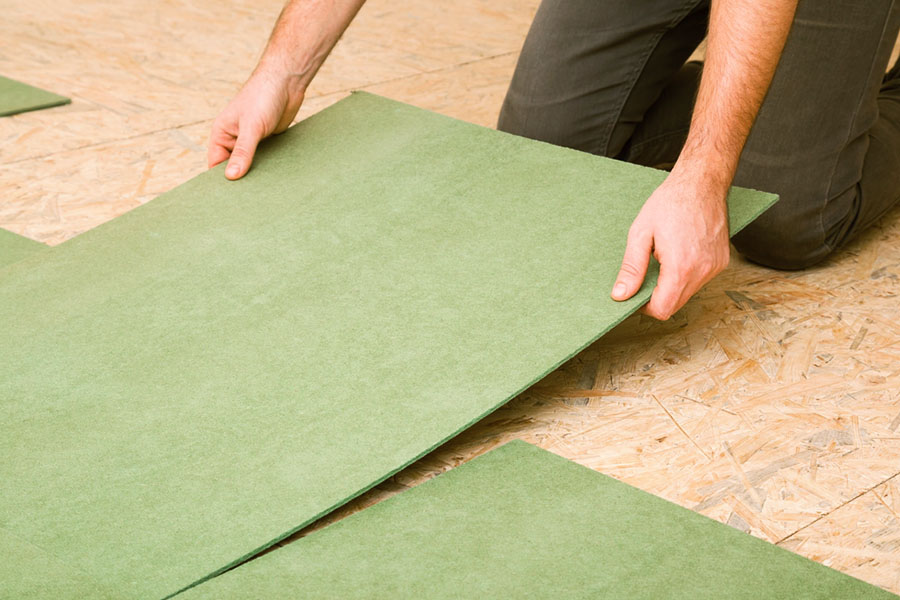
Moisture barriers and underlayment are essential components in flooring installations; a moisture barrier prevents moisture seepage from the subfloor, while underlayment provides a smooth, level surface and offers insulation, sound absorption, and cushioning benefits.
The choice of materials depends on the flooring type. For laminate or engineered wood, use a plastic or polyethylene moisture barrier with foam or cork underlayment. For tile or stone, opt for a cement-based moisture barrier with an uncoupling membrane or crack isolation mat.
For vinyl or linoleum, use a plastic moisture barrier with thin foam or cork underlayment. Proper selection of these materials is crucial, and following manufacturer guidelines during installation is essential to protect your investment and extend the new flooring’s lifespan.
Scheduling and coordinating with installers
Scheduling the installation and maintaining clear communication with flooring installers are crucial steps. Allow ample lead time when booking, coordinate availability and confirm dates, times, and duration.
Discuss project scope, address concerns, and establish a primary contact. Prior to installation day, discuss access challenges or restrictions, entry/exit points, areas needing clearance, and obtain an estimated timeline.
Inquire about potential delays and contingency plans. Addressing these topics beforehand minimizes disruptions and ensures a smooth process. Clear communication and coordination with installers are vital for a successful outcome.
Preparing for installation day
Preparing for installation day involves completing a few last-minute tasks to ensure a smooth process. Clear the installation area of furniture, belongings, and obstructions. Secure pets in a separate room or make arrangements for their care during installation. Also, make arrangements for pets’ safety and comfort, such as boarding or securing them in a separate room with essentials.
Protect surfaces exposed to foot traffic or debris. Set aside a designated area for installers. Ensure it’s easily accessible and well-ventilated. This space will be used to store tools and materials.
By completing these preparations, you create a safe, accessible environment for efficient installation and prevent damage to belongings or disruptions.

Conclusion
You now possess the knowledge to approach your flooring project with confidence and expertise. Every detail has been thoughtfully considered in this comprehensive guide.
Our flooring installation checklist equips you with insider tips and techniques to achieve a stunning, long-lasting finish to elevate the entire aesthetic of your space.
Remember, meticulous preparation is the key to a flawless outcome. From assessing the existing subfloor to selecting the ideal underlayment, these often-overlooked yet crucial steps lay the groundwork for a successful transformation.
By investing time and effort in these preparatory stages, you’ll safeguard your investment for years to come. We hope you have it clear how to prepare for new flooring installation and will soon ensure a beautiful, revitalized space that reflects your style.
